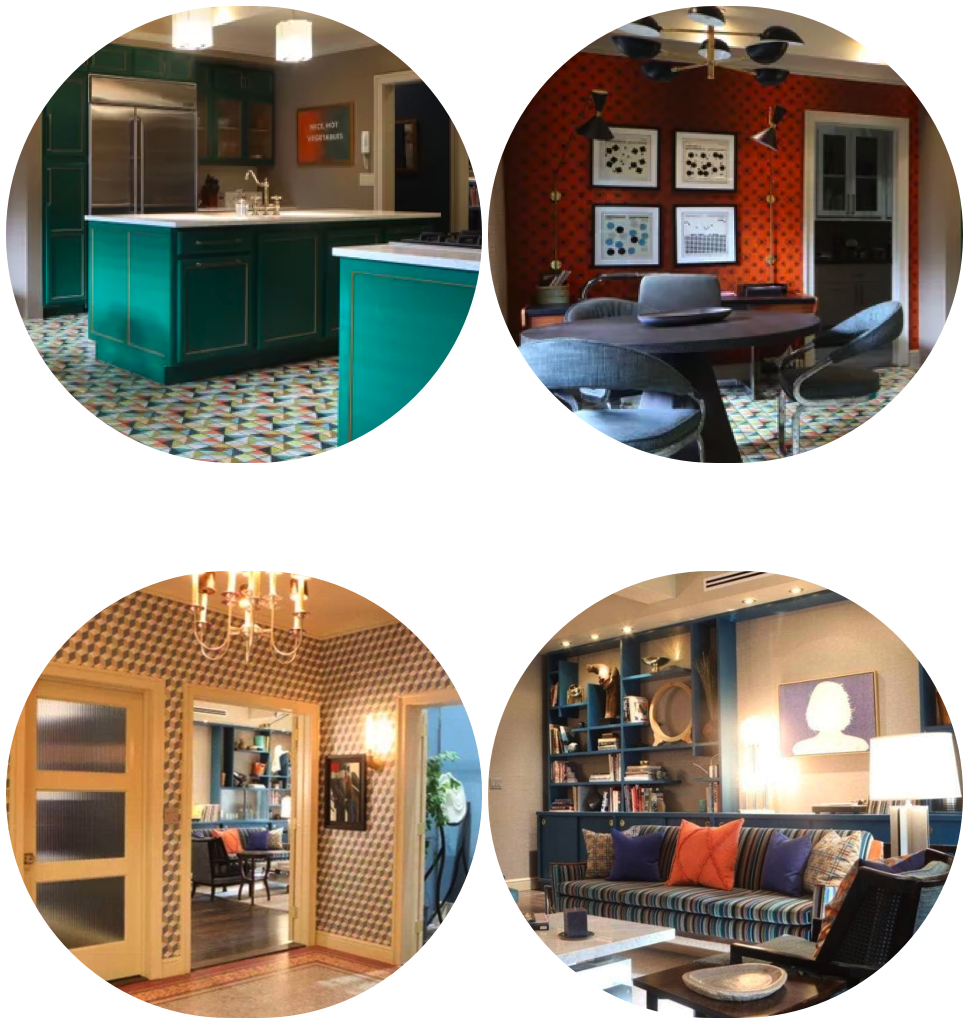
If you have found yourself drawn to any of the apartments in "Only Murders in the Building", it probably says something about your personality. Check out what the design styles of Charles-Haden Savage, Oliver Putnam, or Mabel Mora says about you!
DIY FRIDAY: Cool Woven Pendant Lights
Oh. My. Gosh.
I can’t wait to try this! I love, love, love this project from Poppytalk so much I’m nearly jumping up and down in my desk chair like Tom Cruise on Oprah.
Most of the materials can be found at big-box home improvement stores, but if you’re really thrifty, you can find scrap veneer at building salvage stores, such as Habitat for Humanity’s ReStore.
Now, where to put these? In the office above my credenza? In a reading nook? Over an end table in the media room in lieu of a table lamp? Oh, the possibilities…

What You Need:
- strips of wood veneer (you can also get 3/4 in. veneer at the hardware store that is for ironing on the edge of shelves – you can also use strips of paper)
- white glue
- large clips (or clothes pins) – I started with four and found I needed more as I went along
- scissors
- HEMMA ikea light
- pen
- small piece of cardstock
**safety alert** use a low watt bulb and ensure material chosen is not touching or close to the bulb.
STEP 1-2
Take the strip of wood veneer and make a circle shape to the desired size you want your lamp to be. Place a small amount of glue to the attachment and hold with clip.
STEP 3
Proceed the same way as in step one – creating an overlap on the other strip of veneer.
Glue the attachment and secure with clip.
STEP 4-5
Take smaller strips and weave through the lamp continuing in a circular manner. Secure any overlaps with glue and clip – also allow the glue to dry – it will make it easier to work with the shape.
STEP 6
While the glue is drying take the cardstock and unscrew the ring from the HEMMA pendant light.
STEP 7
Take the unscrewed component and place on card stock and trace the interior – take the scissors and cut out the circle – place the light through the card stock and screw the circular component back on the light
STEP 8
Find a spot on your form for the light and pull through the cord. It’s important to place the light in the center so that the shape hangs leveled.
STEP 9
Add glue to the card stock and secure it to the wood structure with clips.
STEP 10
Make sure there is a spot big enough for your hand to screw in the light bulb.
Before you are done – look at the lamp and decide if you need more strips or if there are areas you need to secure with glue.
Don’t forget to send me your “after” photos to add for others to see!
Related Posts