If you have found yourself drawn to any of the apartments in "Only Murders in the Building", it probably says something about your personality. Check out what the design styles of Charles-Haden Savage, Oliver Putnam, or Mabel Mora says about you!
DIY FRIDAY: Painting Horizontal Stripes
Painting horizontal stipes in a room not only makes it appear bigger, but it adds tons of visual interest without a lot of cost or effort. All you need is some good quality painters tape, a level, a friend (this is a two-person job), imagination and some time.
Spice up your room by adding a metallic stripe, add lots of “WOW” for neutral furnishing by having a dynamic wall with lots of varied thicknesses and colors, or keep it simple and subtle by just adding a stripe in the same color as the base wall but in a higher sheen.
(photos and text by DIY Network)
Step 1: Measure and Mark the Wall for Stripes
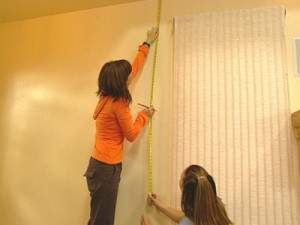
The first step is to take a measurement of the wall (Image 1). For instance, if wall is 91″ high divide the height of the wall by five.
Mark the wall every 18 inches (Image 2).
Use a level to mark a straight line on the wall.
•
Step 2: Tape off the Area for the Stripes
Use painter’s tape just below the line marked so you will be able to paint over the pencil mark.
Press the tape edge firmly against the wall to prevent the paint from bleeding.
Pencil mark the stripes that will be painted to eliminate confusion.
•
Step 3: Apply the Paint and Remove the Tape
Use a paintbrush at edges and roller in the body of the stripes.
Remove painter’s tape while paint is wet to avoid paint peeling when dry.
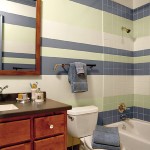
The finished room looks great!


