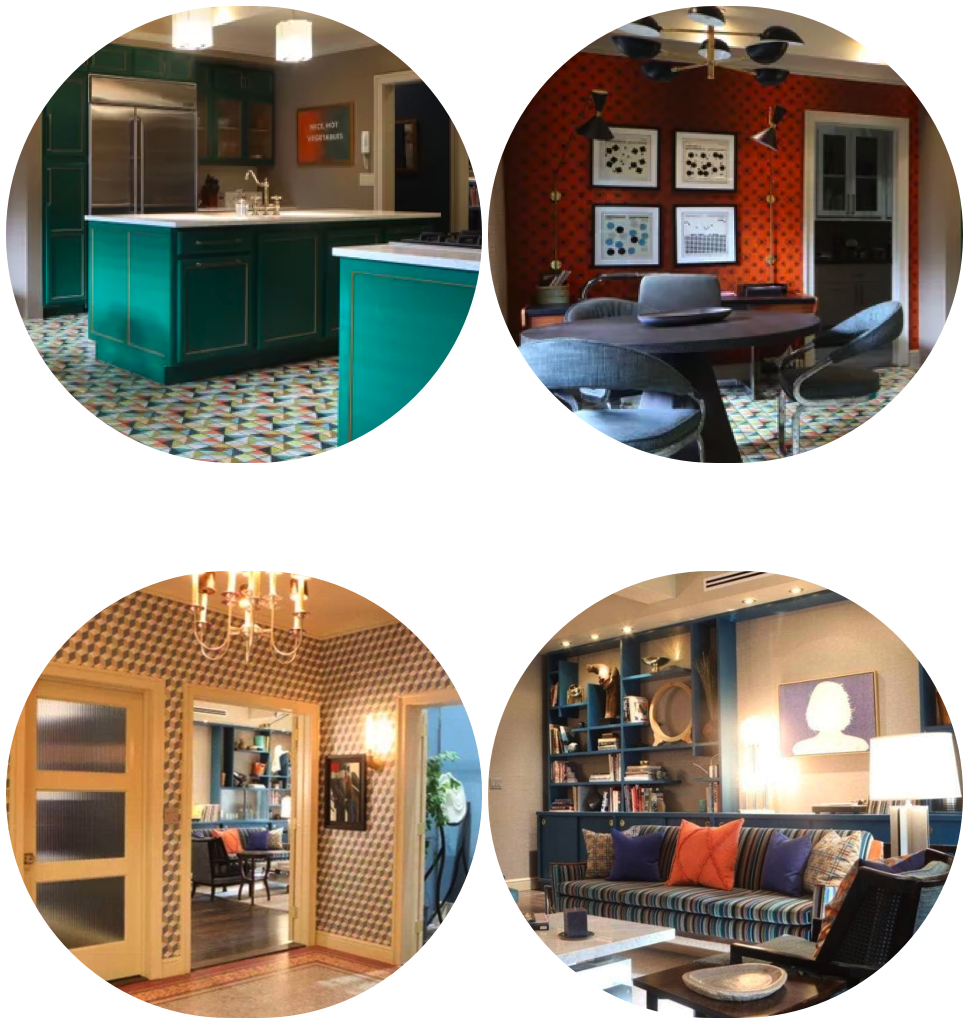
If you have found yourself drawn to any of the apartments in "Only Murders in the Building", it probably says something about your personality. Check out what the design styles of Charles-Haden Savage, Oliver Putnam, or Mabel Mora says about you!
DIY FRIDAY: Simple Tufted Headboard
Have you been looking for a simple way to spice up your bedroom? Would you like to add a more casual elegant touch? Why not try this! Kate from Censational Girl comes up with so many great DIY ideas and allowed us to repost this here! Thanks, Kate!
Here’s the step by step on how she created this casual look for a fabric-covered headboard. For more detailed photo illustrations, please visit her post here.

SUPPLIES:
- 1/2 inch plywood, cut at the home improvement store to your bed’s specifications for width and height
- 2 inch foam to cover plywood
- Upholstery fabric
- Batting
- 1.5 inch finish nails
- ‘D’ ring hooks
- Button cover kits (Plastic is better, because the metal ones are flimsy)
- Embroidery or upholstery thread
- Decorator needles.
TOOLS:
- Jigsaw (if your design is not square)
- Drill and drill bit
- Staple gun and staples
- Sawhorses (if available, for convenience)
Step One (optional): If you want to add curves to your headboard, create a template and mark it on your plywood. You can use simple paper, then mark it with a pen. Cut out your design with a jigsaw.

Step Two: Mark your holes where you want your buttons to go. These were spaced ten inches apart. For more drama, mark for buttons spaced closer together. Use a drill and drill bit (between 7/32 to 5/16) to drill holes where indicated. Make sure you have a clean hole all the way through on both sides.
Step Three: Cut your foam to the size of your plywood. Choose 2” foam squares since it was more cost effective than paying for 2” foam by the yard. You can use 1” if you don’t want it to be thick. (Tip: If using squares, I think it helps to turn your foam flat side out to guarantee a smoother edge around the sides. Thicker foam with the flat side out gives it a very smooth edge.)
Step Four: Use your batting to secure your foam to your plywood with a staple gun. It is not necessary to use spray glue if you are using a good batting.

Step Five: Attach your fabric to your headboard using a staple gun. For this smaller degree of curvature, I was able to get away without sewing a slipcover with seams. For these specific cutouts, start in the middle of the curve, secure with single staple, then slowly work your way out. Then secure your fabric on all four sides. Use the natural corners to pinch fabric and create and attractive edge by overlapping the fabric. Secure with staples.
Step Six – Tufting: Use button cover kits to create fabric covered buttons. Thread your decorator needle with embroidery or upholstery thread. Use Plastic button kits rather than the metal ones if you have a thicker fabric. The metal ones will bend. Push your threaded needle up through the pre-drilled hole, leaving plenty of thread underneath. Then attach your button to your thread. I recommend running your thread through the button twice to get a really secure button.
Push your needle back down through your fabric and foam and pull needle out on other side of pre-drilled hole. Pull your thread taught, then twist it around a finish nail to hold it in place against the plywood. Staple thread to plywood, and criss cross across several times and staple again. Repeat for all buttons and holes in headboard.

Locate the wall studs on your wall, then determine placement of ‘D’ ring hooks. Drive nails into studs, secure ‘D’ ring hooks to back of headboard, then hang on wall.
•
In addition to being a great idea for your own room, consider this as an alternative for expensive furniture in vacation homes, furnished rentals, or staged homes!
If you are looking to redecorate a lake home or are getting ready to sell your home, consider eDECORATING–the affordable online decorating plan that allows you to control your timing & budget, yet provides a comprehensive road map to create a stylish and well-thought-out space!
Related Posts